This post may contain affiliate links. Please read our disclosure policy.
These red velvet cake truffles are rich, sweet, and just a little bit tangy thanks to the addition of cream cheese frosting. Everything you love about red velvet cake, but in the form of a red velvet cake ball!
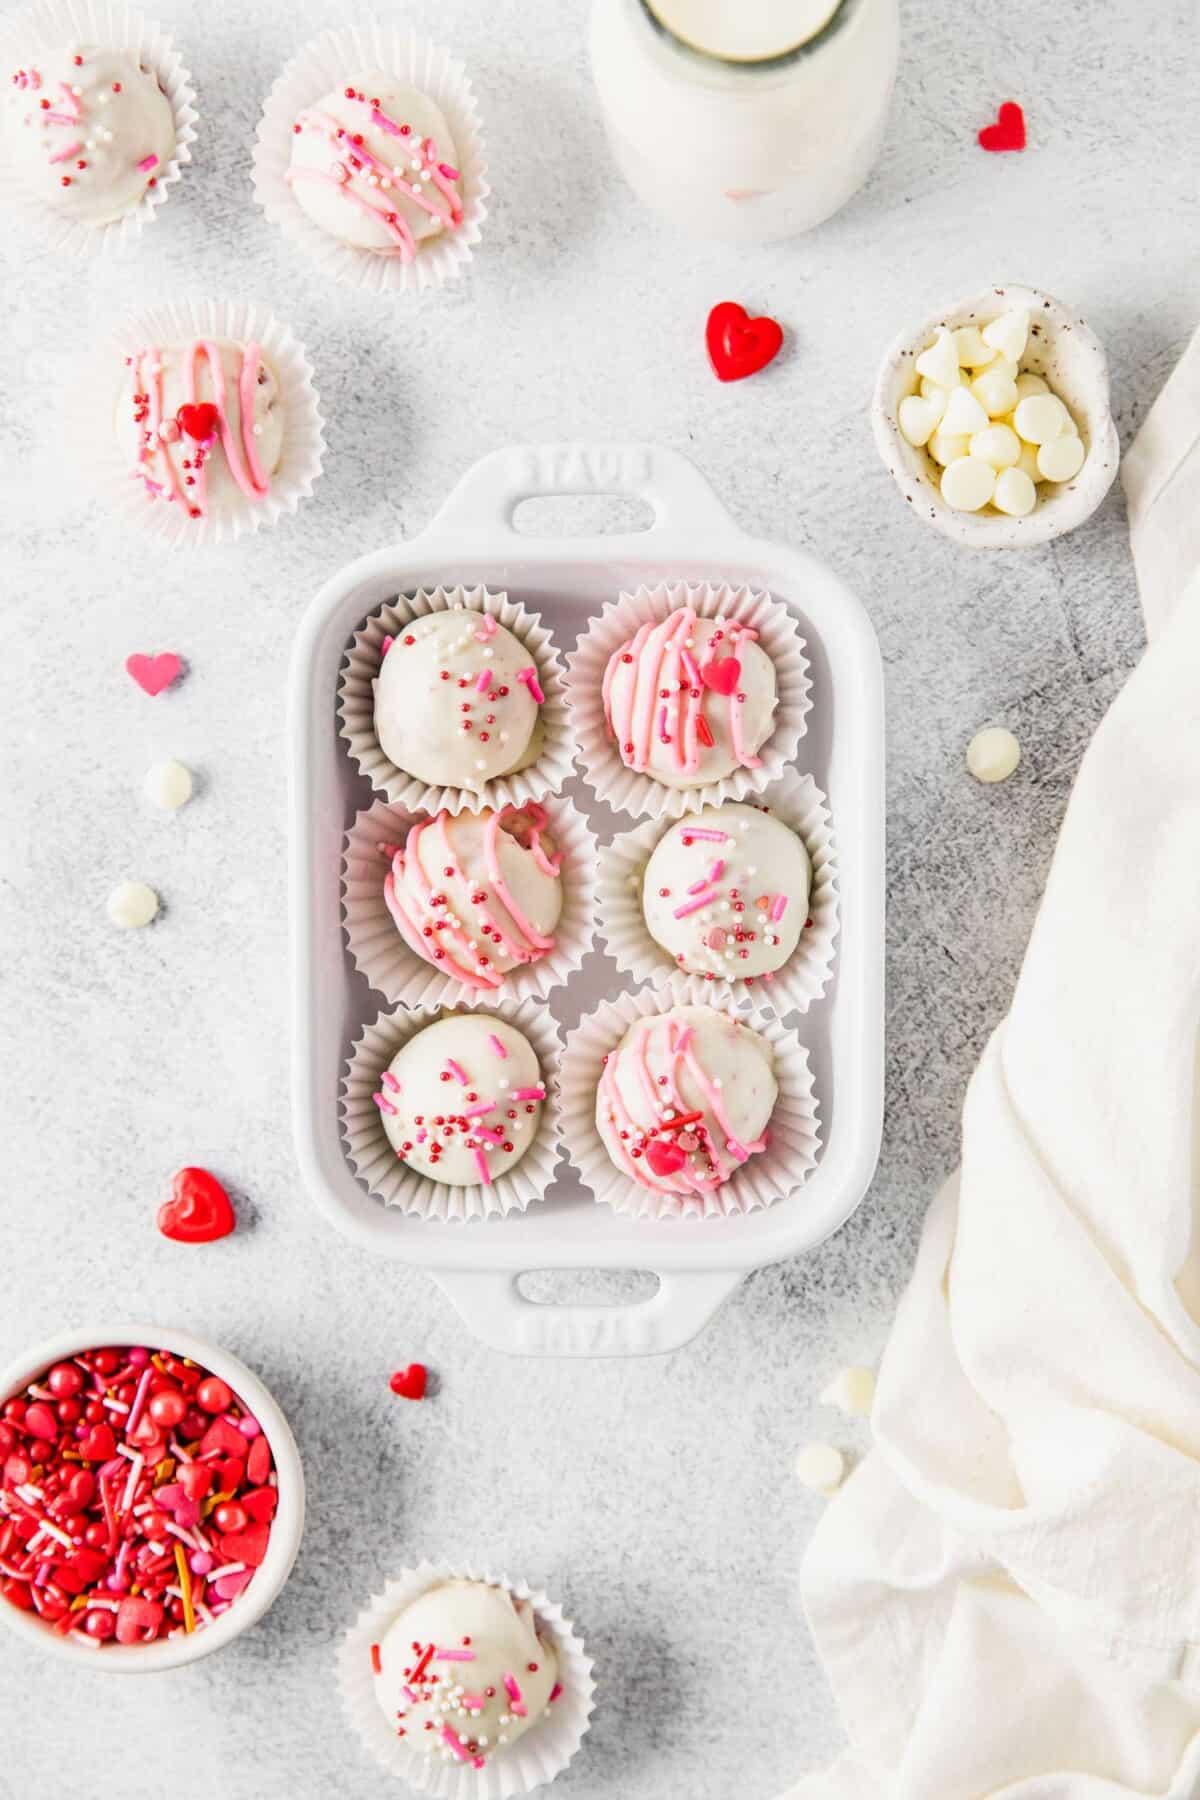
Whether you’re looking for a treat to make for that special someone on Valentine’s Day or just want to treat yourself, these red velvet cake truffles are perfect. They are ridiculously easy, but add some sprinkles and they look like the fancy cake pops you can buy at your favorite coffee shop.
Even better, you can pop these in the freezer and keep them on hand for those days when you need a quick hit of something sweet. (Because let’s be real, keeping red velvet cupcakes in the freezer would be a dangerous situation. Bite-sized red velvet cake balls? Much more manageable!)
How to Make Red Velvet Cake Truffles
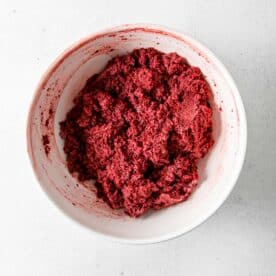
- Make the red velvet cake. Follow the directions on the cake mix box to make the cake. Let it cool completely, then crumble it into a large mixing bowl.
- Warm the frosting. Scoop the cream cheese frosting into a microwave-safe bowl and warm it for 15 to 20 seconds, or until it can be easily poured.
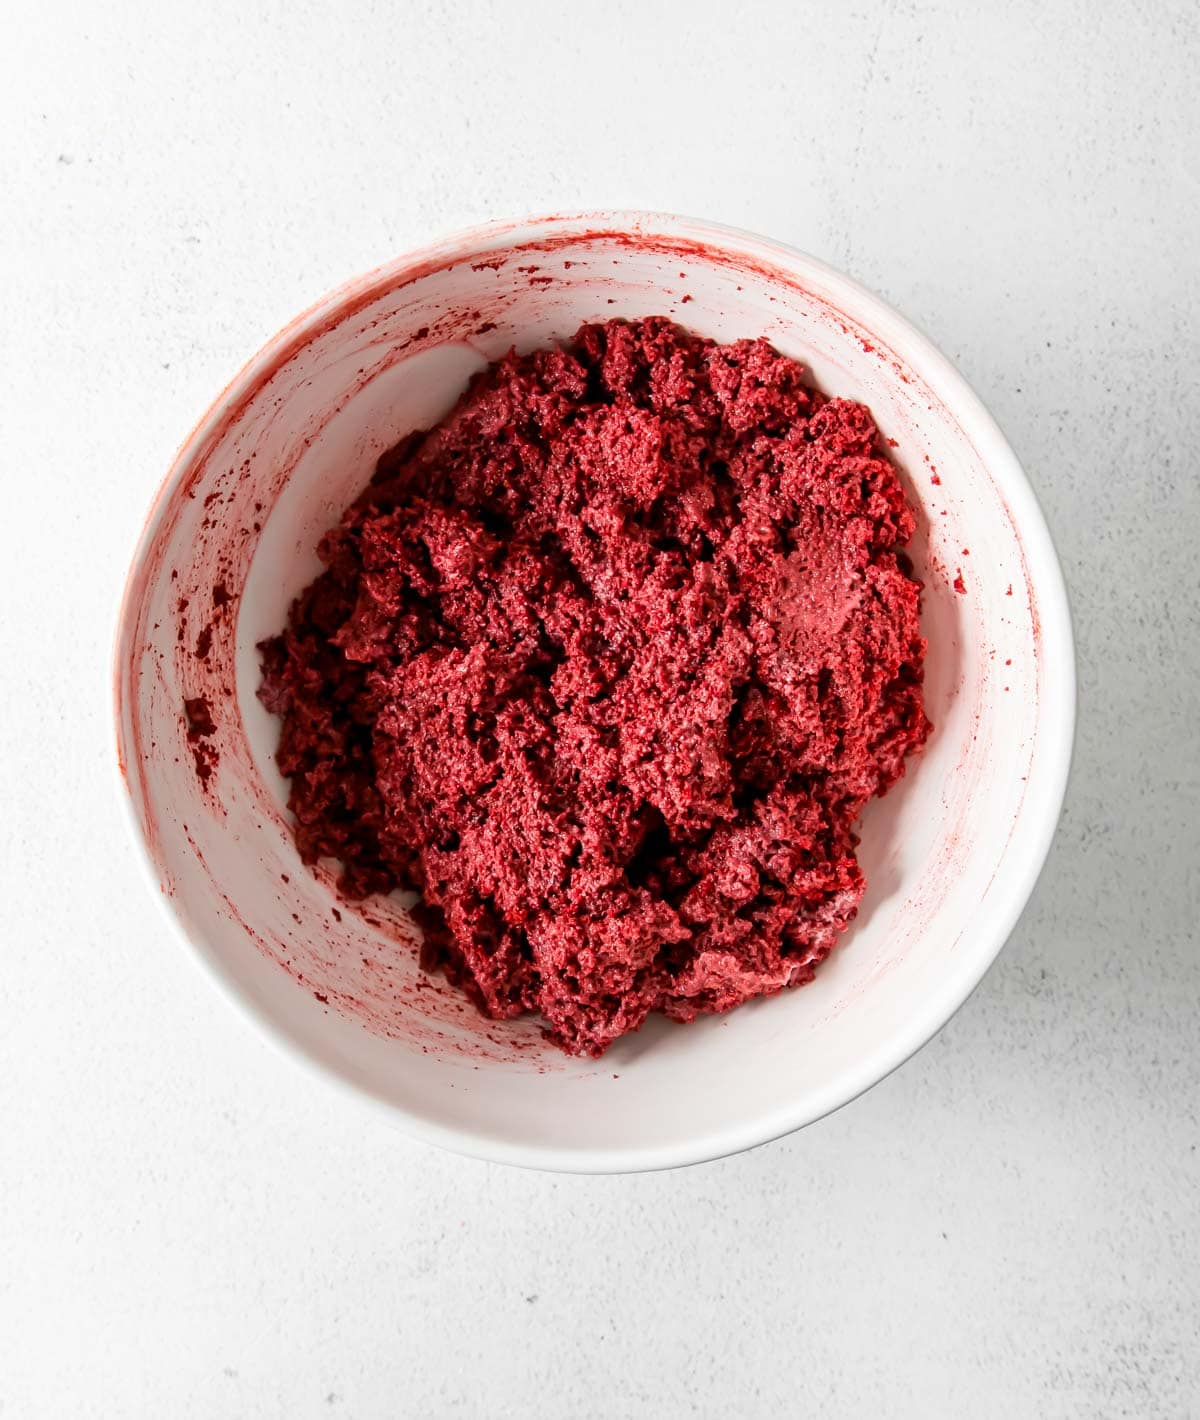
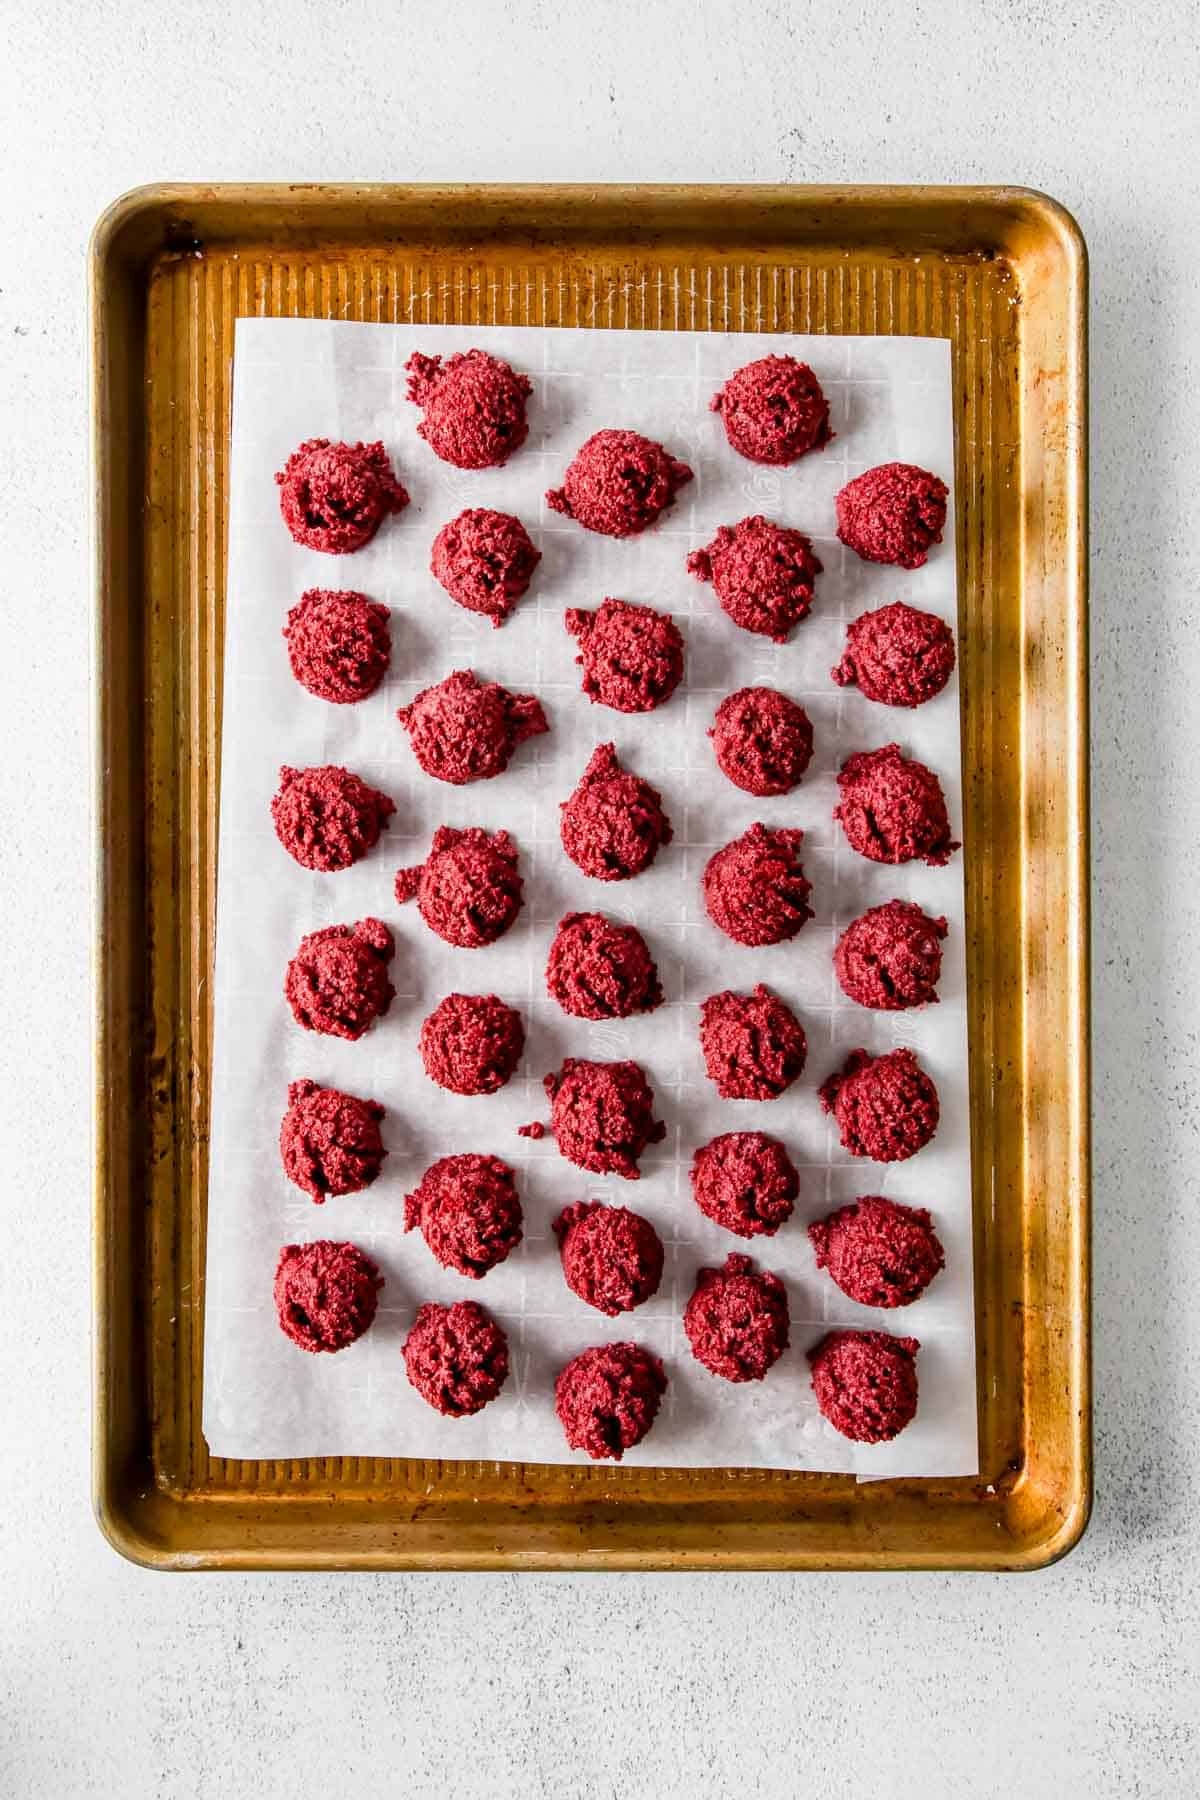
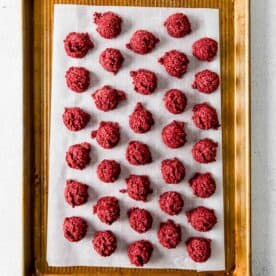
- Form the truffle filling. Pour the frosting into the crumbled cake and stir until the mixture resembles a soft dough. Roll tablespoon-sized balls of dough and place them on a baking sheet lined with parchment paper.
- Freeze. Place the baking sheet in the freezer and freeze the truffles for at least 30 minutes.
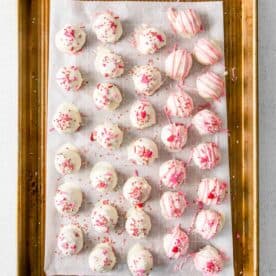
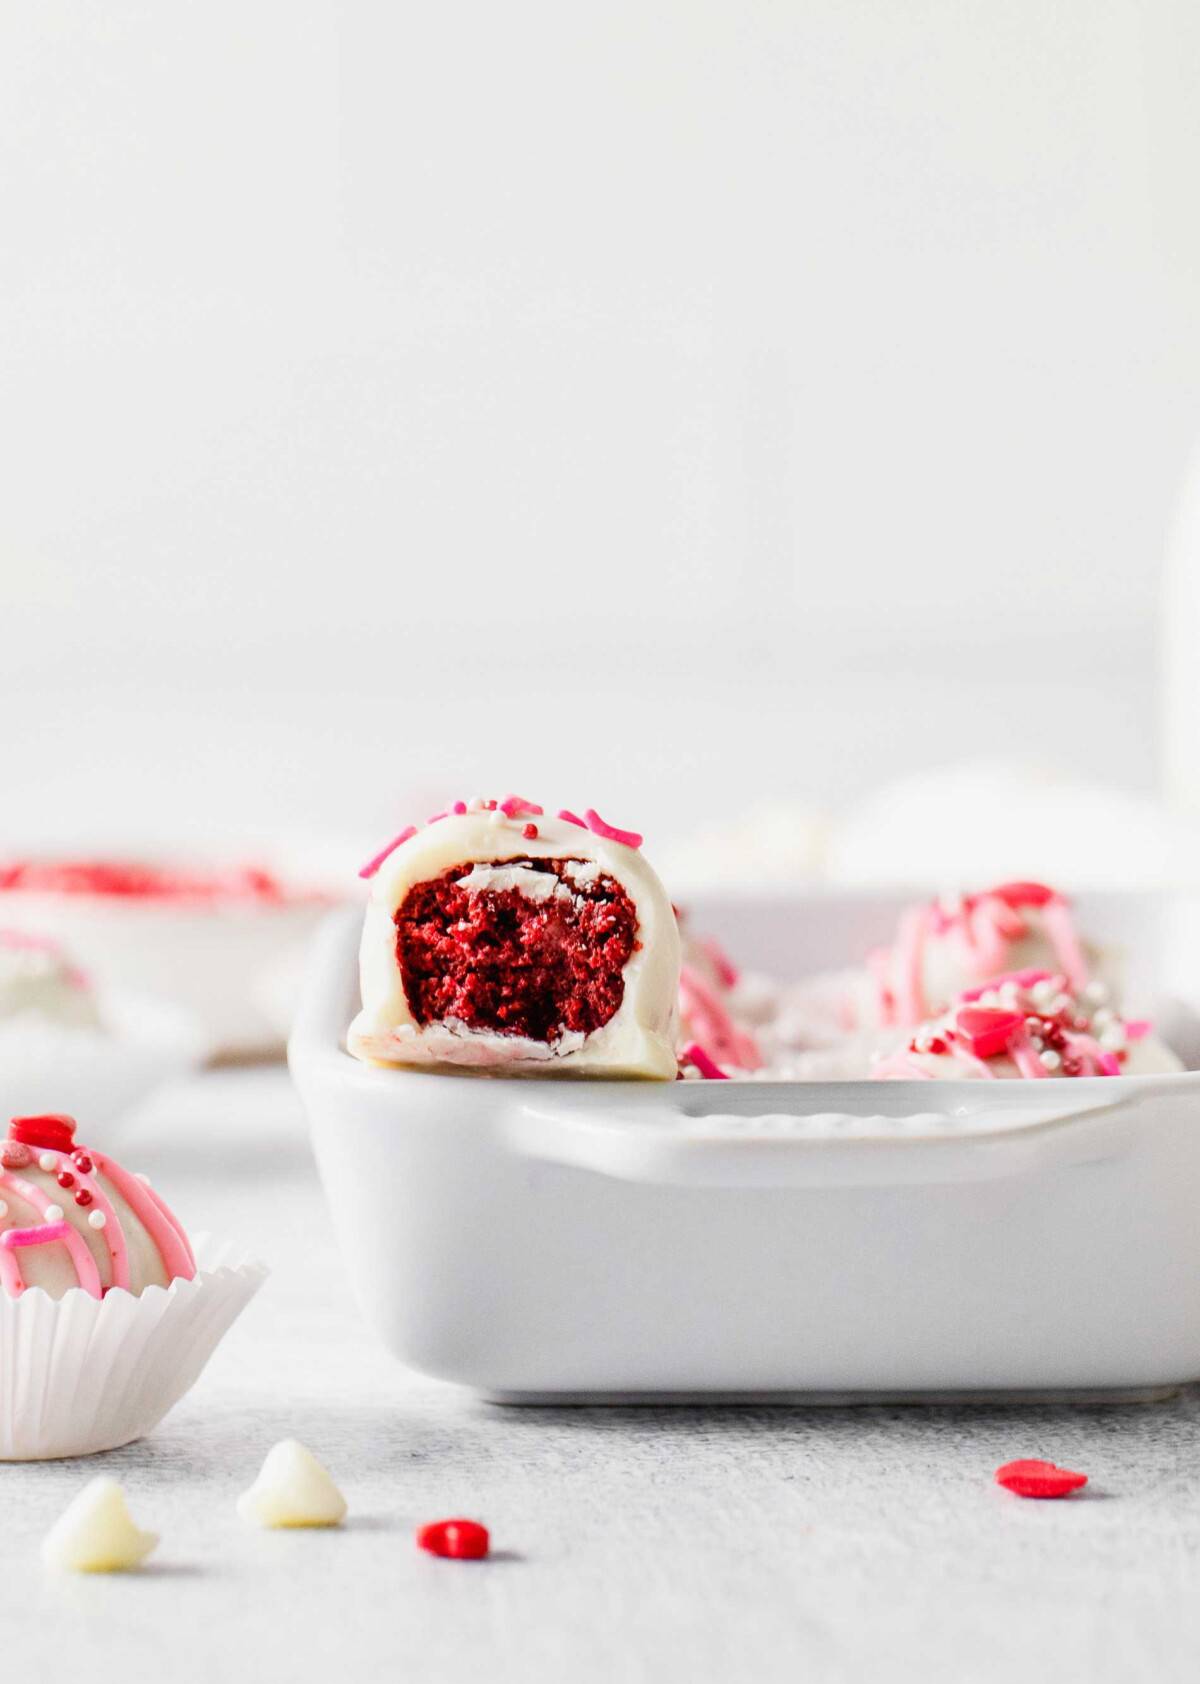
- Dip and decorate. Roll the balls in your hands a bit so they’re smooth and even. Coat each ball with the white chocolate bark, then return them to the baking sheet. If you’re using sprinkles, add them while the chocolate is still wet. Let the truffles set completely before transferring to an airtight container.
- Decorating ideas:
- Use red, white, and pink sprinkles for Valentine’s Day, or heart-shaped sprinkles.
- Dust the truffles with translucent edible glitter.
- Roll the truffles in mini chocolate chips.
- Drizzle dark chocolate or colored almond bark over the truffles after the almond bark has hardened.
Pro Tips
- About the almond bark. Almond bark melts smoothly and hardens quickly; if you want to use white chocolate instead, it needs to be tempered.
- Dipping tips. To make coating the cake truffles easier, use a wooden skewer to pierce each one, then dip it in the almond bark. The bark will fill in where the hole was and if it doesn’t, you can strategically place some sprinkles in that spot. You can also use lollipop sticks and leave them in to make these into Starbucks-style cake pops.
Storing Instructions
Red velvet cake truffles can be refrigerated for up to three days in an airtight storage container. If you need to stack them, place a piece of parchment paper between the layers.
To freeze: You can freeze these cake truffles in a freezer bag or airtight storage container for up to three months. Let them thaw in the refrigerator before serving.

Red Velvet Cake Truffles
Ingredients
- 1 box red velvet cake, prepared according to the box directions
- 16 ounce (454 g) cream cheese frosting
- 16 ounce (454 g) package white chocolate bark
- Sprinkles, optional
Instructions
- Prepare the cake according to the package directions. Allow it to cool completely before making the truffles.1 box red velvet cake
- Once the cake has cooled, crumble it into small pieces and place it in a large bowl.

- Transfer the cream cheese frosting to a microwave safe bowl and microwave it for 15-20 seconds, or just until it is thinned and pourable.16 ounce (454 g) cream cheese frosting
- Add the warm frosting to the crumbled cake and stir until the mixture comes together in a soft dough.
- Scoop out 1 tablespoon sized balls and place them on a parchment lined baking sheet.
- Freeze the truffles for 30 minutes.
- Roll the truffles between your hands to create smooth, even balls.
- Melt the white chocolate bark according to the package directions. Dip the truffles one at a time into the white chocolate bark and then place it back on the parchment lined baking sheet.16 ounce (454 g) package white chocolate bark
- If decorating with sprinkles, make sure to add them while the white chocolate bark is still wet.Sprinkles
- Allow the truffles to set completely before transferring to an airtight container. Store in the fridge for up to three days.