
This post may contain affiliate links. Please read our disclosure policy.
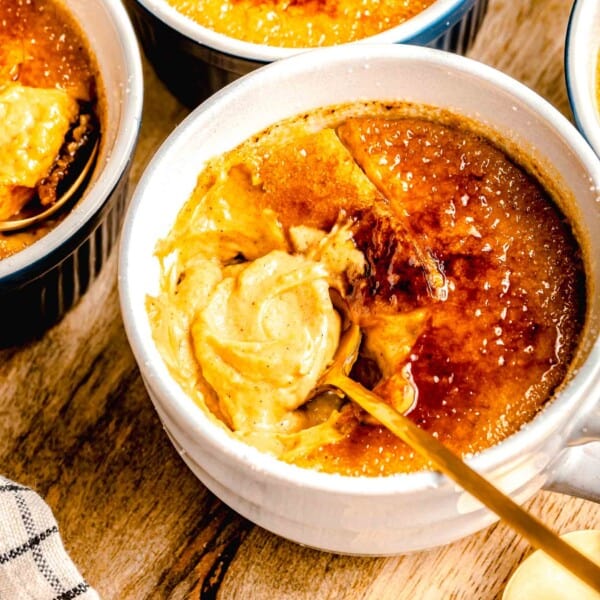
Ever wonder how to make creme brulee from scratch? This easy 5-ingredient recipe produces creamy, rich, restaurant-quality creme brulee with that perfectly caramelized sugar top you know and love.

Creme brulee. It’s one of those desserts you often only see in fancy restaurants (for about a zillion dollars). No more, because you’re about to learn how to make it at home for a fraction of the price. And gosh is it delicious! Imagine this. You tap your spoon on what appears to be the glassy surface of an intriguing dessert to find that it is actually a perfectly caramelized sugar crust that gives way to reveal a luscious, silky custard hiding underneath. You bring the spoon to your mouth and feel the warm notes of vanilla in the custard envelope your taste buds. You bite down and discover the slightest crunch and glorious waves of rich sweetness from the sugar crust. The taste lingers long after you’ve swallowed your first bite. You sigh and think to yourself “I made that”.
With just a handful of wallet-friendly ingredients, you’re about to learn how to whip up a creme brulee that’ll have you wondering why you ever paid a premium for dessert. Let’s dive in and unlock the secrets to this elegant indulgence!

Why You’ll Love This Easy Creme Brûlée Recipe
Creme brulee is one of those timeless, elegant desserts that almost everyone seems to love. Here’s why I think this recipe is so great and why I think you will too.
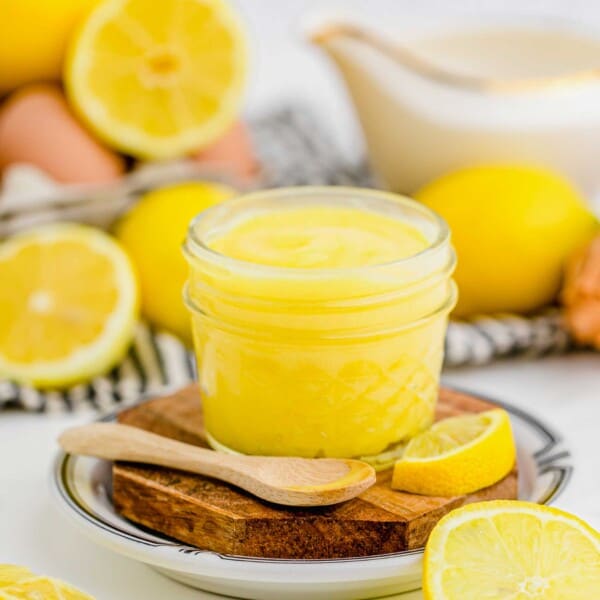
- Just 5 ingredients. Seriously? Does it get any better than that? No long grocery lists here folks. Just heavy cream, vanilla paste, eggs, sugar, and a pinch of salt. Look in your fridge. You probably already have most of it.
- Elegant yet easy. This dessert looks and tastes like it came from a high-end restaurant. Your guests will be raving about it. Let them talk. You don’t have to tell them that you hardly lifted a finger.
- The perfect mix of textures. The vanilla custard glides over your tongue like a delicious cloud while the caramelized sugar crust provides the perfect, subtle crunch creating a wonderful juxtaposition of textures.
- Make-ahead magic. Having a party? Take some of the stress off your plate and make this dessert up to 3 days in advance. Move through the steps up until adding the caramelized sugar topping. Just store the baked custards (covered) in the fridge for up to 3 days and, when you’re ready to serve, sprinkle sugar on top and torch.
What Is Creme Brûlée?
Creme brulee is a classic French dessert that consists of a rich custard base made from cream, egg yolks, sugar, and a hint of vanilla. The custard is sprinkled with sugar and then broiled in the oven or under a culinary torch to create a delicate caramelized sugar crust that gives the dish its name, which translates to “burnt cream”.

What You’ll Need
You’ll only need 5 ingredients to make this delicious vanilla bean creme brulee. Here’s a grocery list for you. Be sure to scroll to the recipe card below for exact measurements.
- Heavy cream
- Vanilla bean paste – Feel free to use 1/2 of a vanilla bean instead.
- Egg yolks
- Granulated sugar
- Salt
How To Make Vanilla Bean Creme Brûlée
Ready for a quick overview of how to make creme brulee. Here it is. Don’t forget to scroll to the recipe card below for more detailed instructions.
- Prep. Preheat the oven to 300°F and fill a saucepan with water and bring it to a gentle boil.

- Infuse. Heat the cream and vanilla bean paste over medium-low heat until bubbles begin to form around the edges. Remove from the heat and let sit for 15-20 minutes.

- Make the custard. Use a fork to whisk together the egg yolks, salt, and sugar until the mixture is pale yellow. Gradually pour the cream into the egg mixture, stirring consistently.
- Bake. Divide the custard among 4-5 ramekins and place them in a rimmed baking pan. Place the pan on the center rack in the oven and carefully pour the boiling water into the pan until it comes halfway up the ramekins. Cover the pan loosely with aluminum foil and bake for 30-35 minutes.
- Cool. Transfer the ramekins to a wire rack and let the custard cool to room temperature.
- Chill. Cover the pan with plastic wrap and refrigerate for at least 4 hours (up to 3 days).

- Torch. When you are ready to serve, sprinkle granulated sugar on top of each custard and use a culinary torch to heat the sugar until it turns golden brown. No torch? No problem. Arrange the ramekins on a baking sheet and pop them under the broiler until the sugar caramelizes into a golden brown topping.
Tips For Success
Creme brulee might seem intimidating but you really can get it right (even the first time) if you follow these simple tips and tricks.
- Be careful with heat. When infusing the cream with vanilla, heat just until the mixture starts to bubble around the edges. No more. You don’t want to burn the milk.
- Whisk with care. When whisking the egg yolks, sugar, and salt, use a fork instead of a whisk. A whisk will incorporate too much air into the custard, which will negatively affect its texture. Also, move the fork quickly back and forth across the bottom of the bowl as opposed to in circles. This will also prevent air bubbles.
- Temper the eggs. You don’t have to do anything fancy here but it is important to pour the hot cream mixture very slowly into the egg mixture, whisking (with a fork) as you go. If you add the cream mixture too quickly, the eggs will scramble.
- Don’t skip the water bath. It might seem silly to pour water into the baking pan but I promise it’s not. The water bath will help create gentle and even heat distribution, preventing the custard from curdling and ensuring a silky smooth finished product.
- Keep an eye. This recipe prescribes 30-35 minutes in the oven but the custards might need more time depending on how deep your ramekins are. So keep an eye on them. Bake until the custards are just set around the edges.
- Chill thoroughly. After baking, refrigerate the creme brulee for at least a few hours or overnight to allow the flavors to meld and the custard to set properly.

Common Questions
Got questions about creme brulee? You’re not alone. Here are some of the questions that seem to come up over and over again when the topic of this classic dessert comes up.
Both! Kind of. The custard should be cold but the caramelized top of the creme brulee should still hold a little bit of heat from the torch.
The custard should be smooth and velvety with richness from the egg yolks and a lovely vanilla flavor. The torched sugar on top should bring a hint of caramel to the dessert.
Creme brulee is a custard. It just has a delicate layer of caramelized sugar on top that other custards do not. The custard in creme brulee also tends to have a richer flavor when compared to others.
Serving Suggestions
This vanilla creme brulee is magnificent on its own but that doesn’t mean you can’t add your own little twist or two to it. Here are some fun ideas to get you inspired.
- Berries. Add a few fresh berries to the top of your creme brulee. Blueberries and raspberries would be my top pick.
- Whipped cream. Grab a store-bought whipped cream or whip up the honey cream from this Boozy Peaches and Honey Cream Shortcakes recipe. Spoon it on top of your creme brulee and feel your taste buds dance.
- Herbs. Add an extra twist of elegance to this already show-stopping dessert with a couple of mint leaves artfully arranged on top.
- With coffee. I love sipping on a shot of espresso while I nibble away at creme brulee. Feeling a little more adventurous? Try my Iced Brown Sugar Oatmilk Shaken Espresso Latte.
- A crunchy cookie. I love serving creme brulee with a side of crisp biscotti or buttery shortbread cookies. Try my Salted Shortbread Chocolate Chunk Cookies or these Caramel Pretzel Linzer Cookies.

How To Store Homemade Creme Brûlée
- Refrigerator. Once the creme brulee has chilled completely (at least 4 hours), wrap each individual ramekin tightly in plastic wrap. Store them in the refrigerator for up to 3 days. Note that the caramelized sugar topping will soften as it sits so I recommend refrigerating any extra creme brulee before you add the topping if you can.
- Freezer. After chilling the creme brulee for at least 4 hours in the fridge, you can wrap each individual ramekin tightly in plastic wrap (ideally before adding the caramelized sugar topping) and store them in the freezer for up to 3 months. Allow the desserts to thaw in the fridge before topping, torching, and serving.
More Decadent Dessert Recipes
Looking for more mouthwatering, restaurant-quality desserts to make in the comfort of your own home? I’ve got a few for you to try (like right now). Here they come.
- Crack Pie
- Brookies
- Slow Cooker Chocolate Cake
- Apple Almond Cake
- Instant Pot White Chocolate Cheesecake with Raspberry Sauce
- Triple Berry Cheesecake Bars

Crème Brûlée
Equipment
Ingredients
- 2 cups (473 ml) heavy cream
- ½ teaspoon vanilla bean paste, or 1/2 a vanilla bean
- 3 egg yolks
- Pinch of salt
- ¼ cup (50 g) granulated sugar
Instructions
- Preheat oven to 300 °F (149 °C)
- Have a saucepan or tea kettle of boiling water ready.
- In a small saucepan, add the cream and vanilla bean paste, stir to mix and set the pan over medium-low heat.2 cups (473 ml) heavy cream, 1/2 teaspoon vanilla bean paste
- Warm the cream until bubbles form around the edges and steam begins to rise to the surface. Remove from heat and let steep for 15-20 minutes.
- While the cream mixture is steeping, in a medium bowl, whisk together the egg yolks, salt, and sugar until the mixture is pale yellow. This will take about 5 minutes of heavy whisking — however, I must warn you that using a whisk makes it really airy and bubbly so use a fork with this process. When using the fork, don't whisk in circles (creating more air), instead, keep the fork low and move it fast back and forth.3 egg yolks, Pinch of salt, 1/4 cup (50 g) granulated sugar
- Once the mixture is pale yellow, gradually pour the cream into the egg mixture, stirring until blended.
- Divide the custard among the ramekins and place the ramekins on a baking pan.
- Pull out the middle rack of the oven and place your baking pan on top. Then very carefully, pour boiling water to fill the pan almost halfway up the sides of the ramekins.
- Cover the pan loosely with foil and slowly push the rack back into the oven.
- Bake until the custards are just set around the edges, about 30-35 minutes, but could be longer depending on how many ounces your ramekins are. Mine were 4 ounce ramekins.
- Transfer the ramekins to a wire rack and let cool to room temperature. Cover with plastic wrap and refrigerate until chilled, at least 4 hours or overnight. They will keep up to 3 days.
- Before serving, sprinkle a heavy layer of granulated sugar on top of the custard. Using a kitchen torch, melt the sugar. Move the flame gradually in small circles over the surface of the custard, heating the sugar until it is evenly melted and golden. The sugar will harden in a few seconds and your crème brûlée is ready to eat!
Nutrition
Photographs by Eat Love Eat


I need to get myself some ramekins and a kitchen torch!!! like….now.
yes, you do! don’t get ramekins at W&S — go to Pier 1 or Crate & Barrel. I got my ramekins at Pier 1 for $1.20 each! :) you can find a decent kitchen torch on amazon.
I need to invest in a kitchen torch! This looks so good!
oh, you really do!! they’re so fun and worth the investment :)